

How to beat the Hollow Knight Silksong Savage Beastfly
How to beat the Hollow Knight Silksong Savage Beastfly
How do you beat the Silksong Savage Beastfly? The oversized Diptera encountered in Hunter's March and during the Savage Beastfly wish quest have been causing all sorts of havoc for players. If you're here, that probably means you're sick of being charged to death by them and their floaty minion legion, or have heard the horror stories from elsewhere. We feel your pain. Fortunately, we've got the tech for finally doing away with both of them.
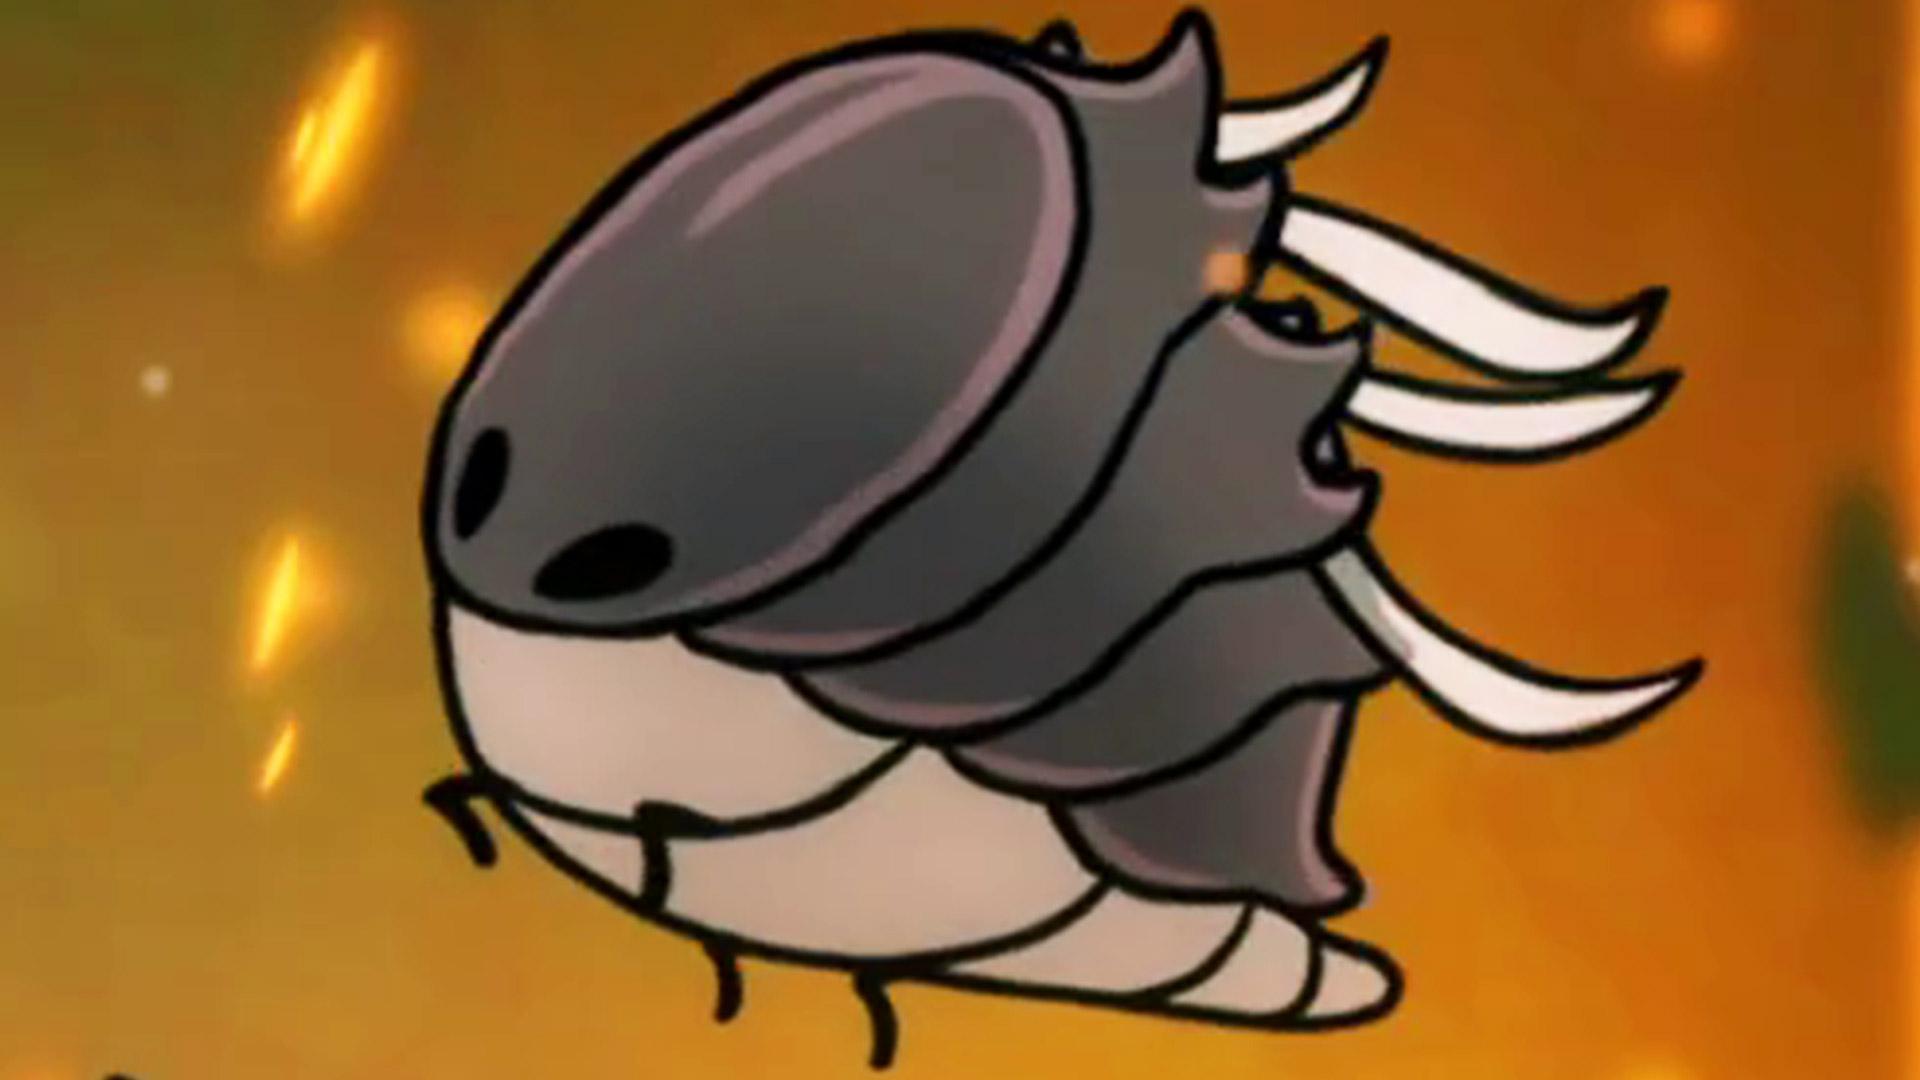
One of the many Silksong crests you can acquire is guarded by this hulking mass. This Silksong boss, similarly to the Moss Mother, summons extra enemies for you to keep track of, making the encounter rather hectic. If you're still getting your bearings in Hollow Knight Silksong, the Savage Beastfly makes for one of the game's most unforgiving fights. But, with sound preparation, it becomes much more manageable. Here's how to beat the Savage Beastfly. Compulsory spoiler warning as we mention certain bosses and locations that aren't accessible until Act 2, though this isn't until after the Hunter's March Beastfly section.

Where to find the Savage Beastfly in Hunter's March
The Hunter's March Savage Beastfly can be found in the Chapel of the Beast, which is in the bottom-right corner of the region. You will need the Drifter's Cloak to navigate the chapel.
Rather than making the trip to Hunter's March as soon as you find the entrance in The Marrow, we'd first recommend scooping up some extra mask shards and a needle upgrade. You'll also have a much easier time of things if you first take a trip to Greymoor to unlock the Silk Storm ability, which helps manage the spawns, and the Reaper Crest to make pogo'ing through Hunter's March a breeze if you're still struggling with Hornet's diagonal default. This means not touching the region until you've defeated Widow in Bellhart, but it's worth it for your sanity. Hunter's March is an entirely optional region, after all, so you're not missing out on much by skipping it for now.
Before heading into the chapel, it's best to grab the Hunter's March bench to avoid an arduous run-back from The Marrow, Deep Docks, or Far Fields. Once inside, follow the linear route through the chapel, which will effectively take you in an anti-clockwise loop up and around the area. After drifting down the final tube of spikes, make sure you hit the lever next to the bone door to open up a shortcut, before running left into the boss arena.
How to beat the Savage Beastfly in Chapel of the Beast
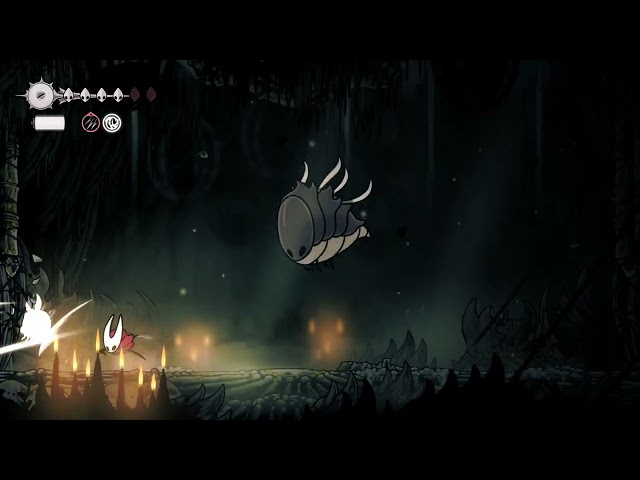
The Savage Beastfly is a simple enough foe on paper. It has two clearly-telegraphed attacks - an arena-long charge and a triple downward slam - and a shout that summons in smaller Beastflies and spike-spouting Kiliks. Judging the height of the Beastfly's charge and managing spawns is where the difficulties lie for most, so let's talk about those first.

Typically, the Beastfly will have a short delay between readying its charge and zooming. From what we've gathered, the height from which it charges is sometimes random, and other times based on Hornet's current position. At the very least, try to avoid being mid-jump during the wind-up, as the Beastfly will often end up doing a mid-height jump that's both impossible to dodge under and pogo over. If you're really struggling, spend an attempt only dodging the Beastfly without striking to really get a feel for how it moves.
As for the summons, make liberal use of your available tools and Silk Storm to take out the smaller enemies as soon as possible. If you have plenty of breathing space and can simply thwack them away, as we do throughout the fight, then you can save your silk for healing. The Reaper Crest brings huge value here, thanks to its silk generation passive that lets you quickly top yourself up after binding.

The Reaper Crest is also a great option during the fight due to its innately lengthier strikes, which minimize the chance of taking unnecessary contact damage. There are plenty of opportunities to get a hit in throughout the fight. You can pogo the Beastfly's floor dash, before turning and getting an extra strike in as it passes through. Likewise, you can upslash its high charge. There's also a window to hit its face before it begins its charge.
A big DPS chance you want to take advantage of is whacking the Beastfly's sides when it does its downward smash attack. Position yourself roughly two Hornets away from its landing spot, then swipe as it hits the ground. As with any other Silksong boss, the faster you kill the thing, the less time you have to spend dealing with its mechanics. Our attempt isn't clean by any means (we definitely weren't used to using tools by that point), but it's a very manageable fight with the correct prep.

Where to find the Savage Beastfly in Far Fields
The Far Fields Savage Beastfly can be found in the Fourth Chorus boss arena, below the Far Fields Bellway. To spawn it, you'll first have to accept the Savage Beastfly wish quest from the wish board in Bellhart.
You won't be able to access this hunt until you've defeated the Cogwork Dancers in Act 2. Once the wish is picked up, simply head back to where you beat the Fourth Chorus in Far Fields to begin the encounter. You can either set your bench at the Far Fields Bellway, or take the hidden shortcut to the right of the Bellway round and down to the Seamstress' hut and set your reset point there.
Ahead of our tango with the second fly, we went away and got wings of our own. After beating the Cogwork Dancers, we headed through Whiteward, down into the east side of the Underworks to retrieve the Clawline skill. From there, we booked it over to The Slab, out and up Mount Fay to collect the Faydown Cloak.

But we didn't only become more mobile. The best Silksong tools are an absolute game-changer for this fight, as you'll want to try and save as much silk as possible for those emergency heals. For our loadout, we brought the Sting Shard, which you can get for 140 Rosaries and a Craftmetal from the Forge Daughter in Deep Docks, and Flea Brew from completing the first part of the quest that asks you to find Silksong flea locations. What really makes this setup shine is the Pollip Pouch, acquired by completing the Rite of the Pollip quest in Shellwood. This blue charm applies poison to your tools, dealing a ton of bonus tick damage over time.
As for other charm recommendations, the Magma Bell (blue charm) will reduce the damage you take from falling into lava or being hit by fire-based attacks. This can be purchased from the Forge Daughter in Deep Docks for 110 Rosaries and one Craftmetal. A yellow charm that will serve you well is the Magnetite Dice, which has a chance to cancel out an instance of damage - you'll see why this is useful at the end of our video below. This can be acquired from the Silksong dice game.

How to beat the Savage Beastfly in Far Fields
The second Savage Beastfly doesn't bring anything new to the table in terms of abilities, so for the big guy, you can simply continue following the advice given above. However, there are two big differences this time around: the terrain on which you're fighting, and the fact that the Beastfly now spawns in sticky fireball-spewing Tarflies during its later phases.
As with the Fourth Chorus fight, the Beastfly has the means to temporarily remove the arena's floor blocks. It will follow Hornet's movements, and seems to decide which block to smash next based on her location when it begins floating back up. This means that, if you float above a block it has already taken out, it should then dive into the magma, ending the combo. It's a finicky timing to get down, so don't worry about it too much, but it's worth bearing in mind.

If anything, we try to manipulate the Beastfly into hitting every other block, making navigating the arena significantly easier. It will occasionally do the downward smash sequence twice in a row. In this instance, use your Clawline, double jump, and float to keep yourself airborne until a platform reappears.
Once you've phased the Savage Beastfly, it'll begin calling upon Tarflies. In phase two, it'll summon one, and in the final phase it'll summon two of the blighters. As noted, these fire-flaming projectiles, telegraphed by their eyes beginning to glow, stick to the arena floor, so watch your step. We'd recommend killing these the second they appear if possible.

It's during the Tarfly phases that we begin using our tools. Depending on how many tool upgrades you've picked up so far, one Sting Shard is sufficient for each Tarfly, but we typically use two at a time to make sure they die (also, more damage on the boss = good). Popping the poisoned Flea Brew also creates a poisonous mist, which ensures everything that comes near you takes plenty of bonus damage. The Beastfly's downward smash will kill off the Tarflies on hit, but don't count on it as a consistent way to manage the spawns.
Once the Beastfly is dead, grab the item it drops and head back to the Bellhart wish board to turn in the quest, rewarding you with a mask shard.
And that's how to kill both Savage Beastfly bosses you'll come across during Hornet's big Pharloom adventure. If you're still unable to clear them, it may be time to turn to some of the best Silksong mods for a helping hand. If you need some extra cash to buy the recommended loadout tools, check out the best Silksong Rosary farm locations.