


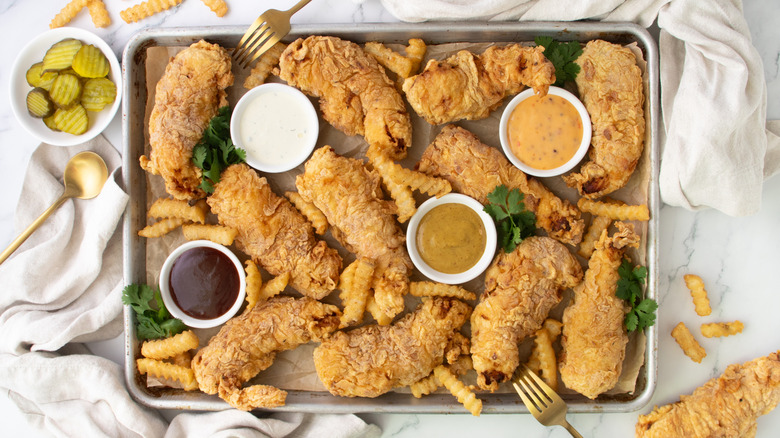
These Extra Crispy Chicken Tenders Get Their Crunch From A Vodka Batter
Patterson Watkins/Mashed
We may receive a commission on purchases made from links.
Chicken tenders can be as accessible as picking them up from your favorite fast-food joint or reheating them from frozen. But for recipe developer Patterson Watkins, making them from scratch at home is the way to go. Her recipe for extra crispy chicken strips incorporates all her favorite qualities of good chicken tenders. "Juicy on the inside, super crispy crust with an audible crunch when I bite in, and sizable enough to not be confused with a nugget," she describes.
Watkins carefully crafted this recipe to attain such results. She included a robust seasoning blend in the marinade and the dry coating to ensure that the chicken and breading both have flavor. Meanwhile, to achieve the optimal texture, the chicken is marinated in buttermilk, which is moderately acidic and aids in tenderizing, "resulting in juicy moistness," says Watkins. Finally, the chicken is coated in a wet batter (featuring, stay with us now, vodka) once and a dry batter twice, further enhancing the crispy breading. These steps make for a juicy, crispy chicken that you will love.
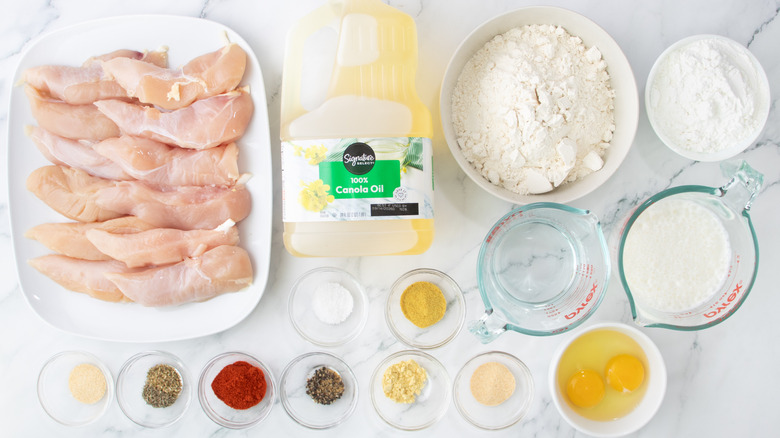
Gather the ingredients for extra crispy chicken strips
Patterson Watkins/Mashed
A handful of seasonings are needed to make the seasoning blend, but you'll likely have some of these in your spice cabinet already. If not, get paprika, garlic powder, onion powder, chicken bouillon powder, salt, mustard powder, dried thyme, dried oregano, and black pepper. Next, for the chicken, you'll need buttermilk, chicken tenderloins, all-purpose flour, cornstarch, vodka, eggs, and oil for frying.
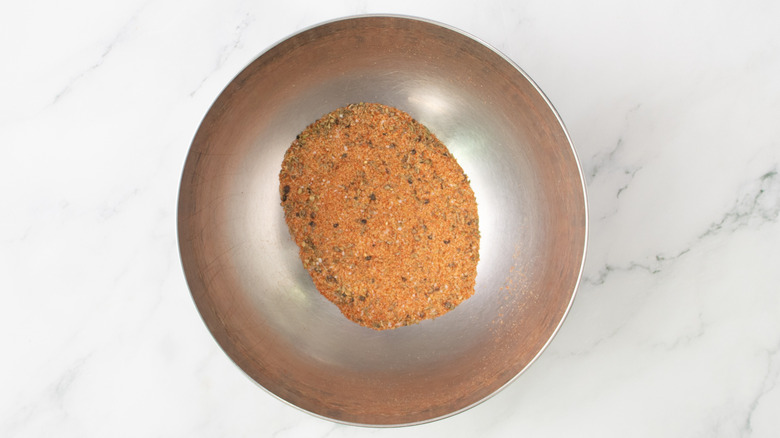
Step 1: Put together the seasoning blend
Patterson Watkins/Mashed
To make the seasoning blend, in a medium bowl, add paprika, garlic powder, onion powder, chicken bouillon powder, salt, mustard powder, thyme, oregano, and black pepper. Stir to combine.
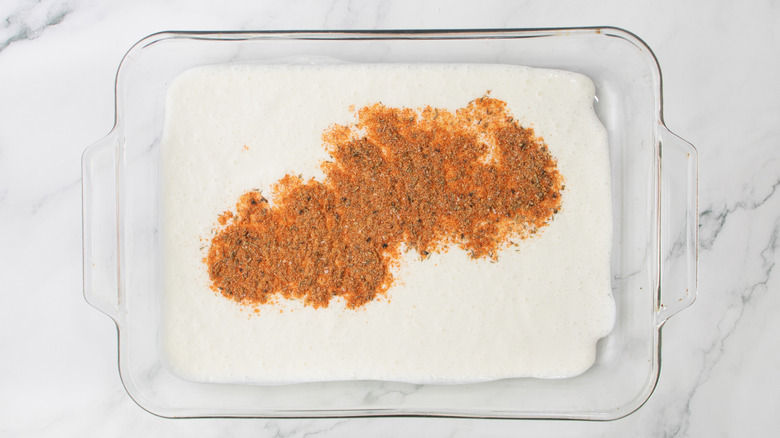
Step 2: Whisk buttermilk with seasoning
Patterson Watkins/Mashed
Pour buttermilk into a casserole dish, season with half of the seasoning blend, and whisk together.
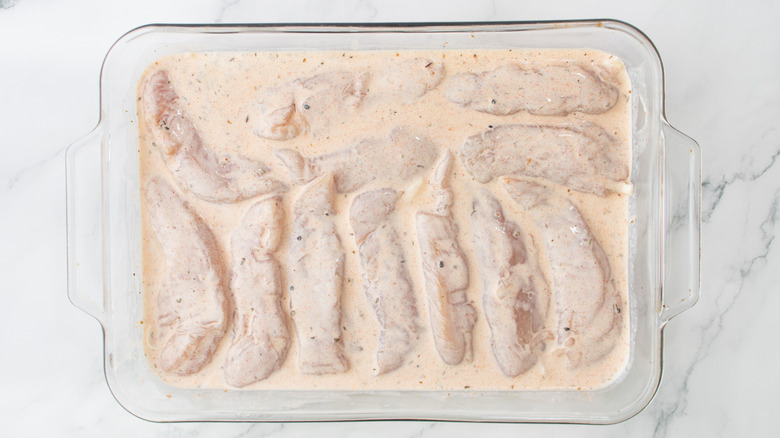
Step 3: Marinate the chicken in buttermilk
Patterson Watkins/Mashed
Submerge the chicken tenders in the seasoned buttermilk. Cover the dish with plastic wrap and refrigerate for 2 to 4 hours, flipping the tenders midway through marinating.
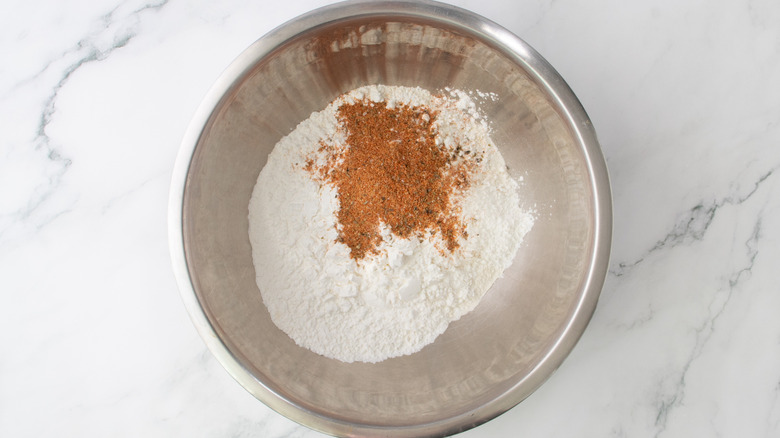
Step 4: Combine the dry coating ingredients
Patterson Watkins/Mashed
Create the dry coating by whisking together 1 ½ cups flour, 1 cup cornstarch, and the remaining seasoning blend in a large bowl. Set aside.
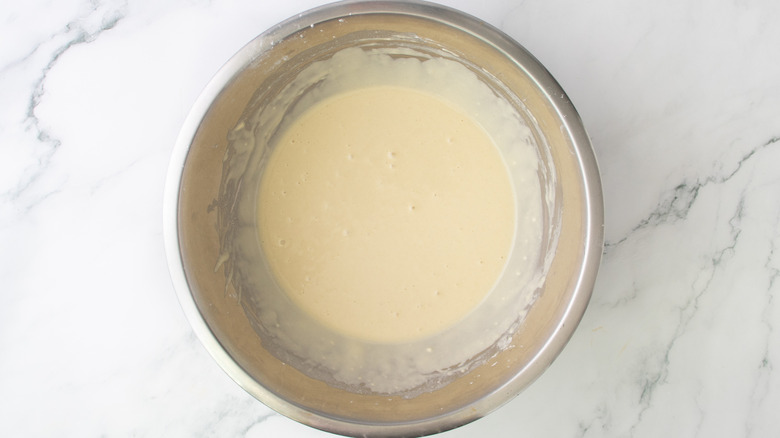
Step 5: Make the wet batter for the extra crispy chicken strips
Patterson Watkins/Mashed
To start the wet batter, in a large bowl, combine the vodka, 1 cup flour, ½ cup cornstarch, and eggs with a whisk. If it seems too thick, add 1 tablespoon of water at a time to thin it out.
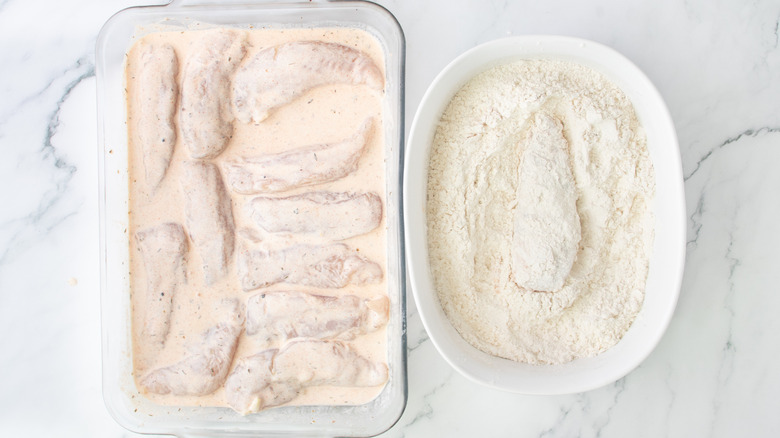
Step 6: Cover the tenders in the dry coating
Patterson Watkins/Mashed
Once the tenders are done marinating, work in batches to shake off any excess marinade on the chicken strips before completely dredging them in the dry flour mixture.
Step 7: Move the tenders to the wet batter
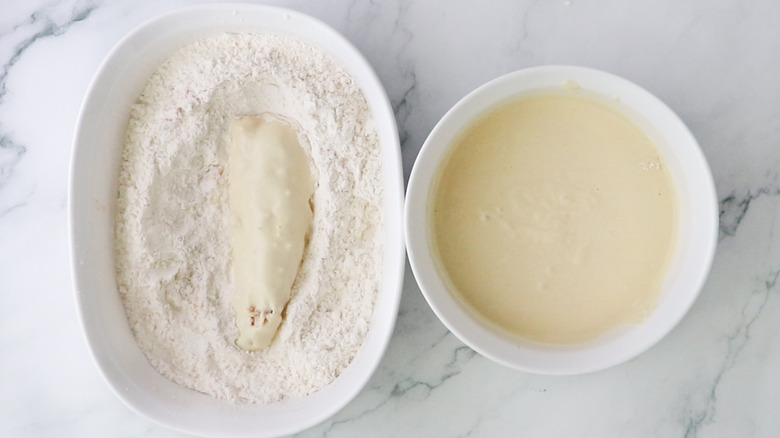
Patterson Watkins/Mashed
Fully dunk the floured tenders into the wet batter. Shake off any excess wet batter before returning the tenders to the dry coating.
Step 8: Return to the dry coating
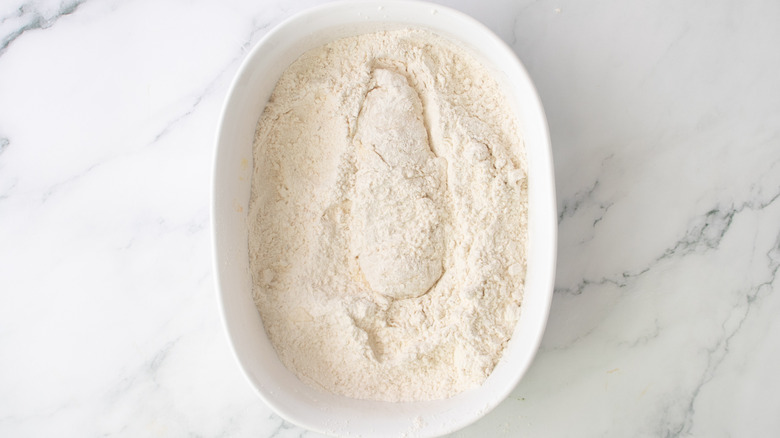
Patterson Watkins/Mashed
Completely cover the chicken strips in the dry coating.
Step 9: Take out a wire rack

Patterson Watkins/Mashed
Once coated, transfer the tenders to a wire rack on top of a baking sheet. Set aside.
Step 10: Heat the frying oil for the extra crispy chicken strips
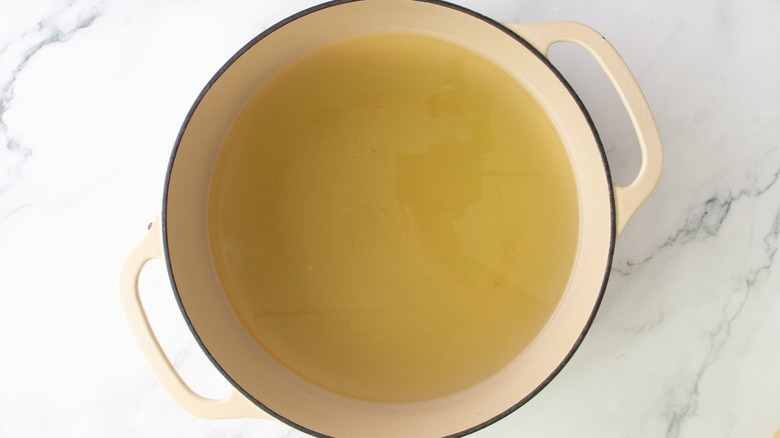
Patterson Watkins/Mashed
Fill a deep fryer or a quarter of a large pot with oil over medium-high heat until it reaches 350 F.
Step 11: Fry the tenders
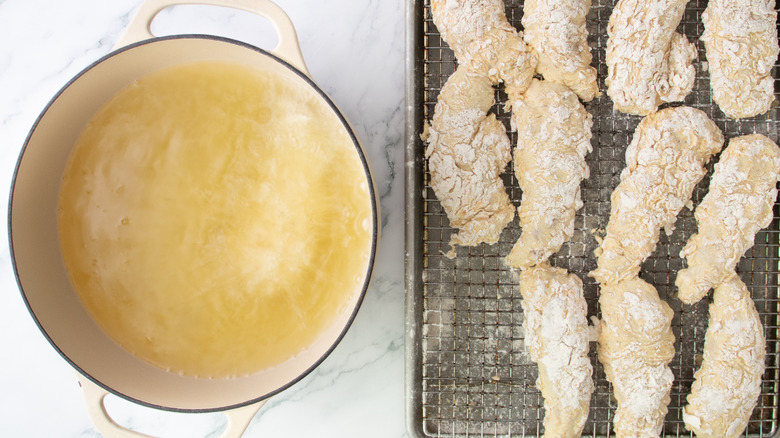
Patterson Watkins/Mashed
Working in small batches, carefully place the tenders into the hot oil, and fry for 6 to 8 minutes or until cooked through and crisp and golden brown.
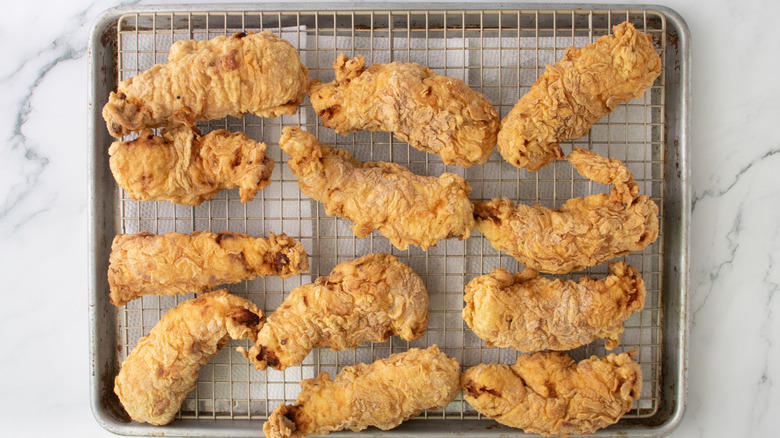
Step 12: Drain the extra crispy chicken strips
Patterson Watkins/Mashed
Place the fried tenders on another wire rack on top of a baking sheet or paper towels.
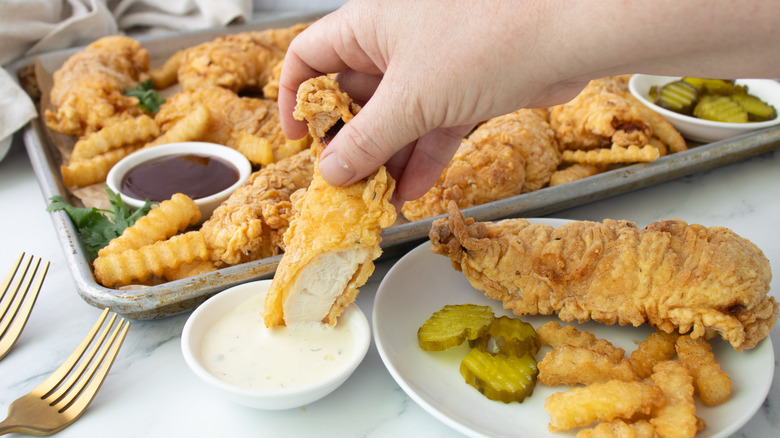
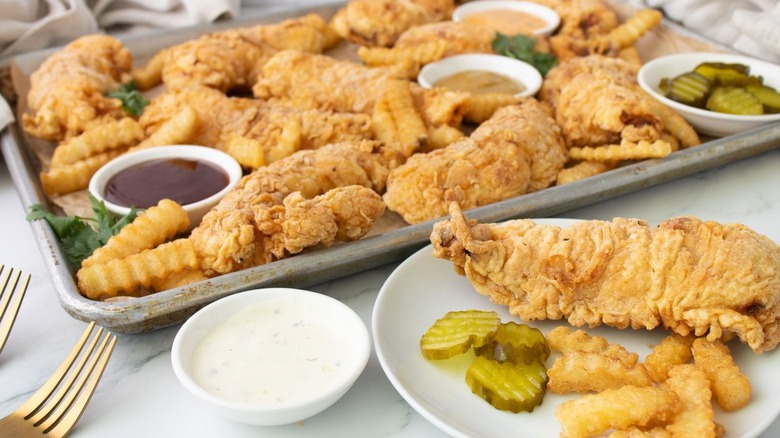
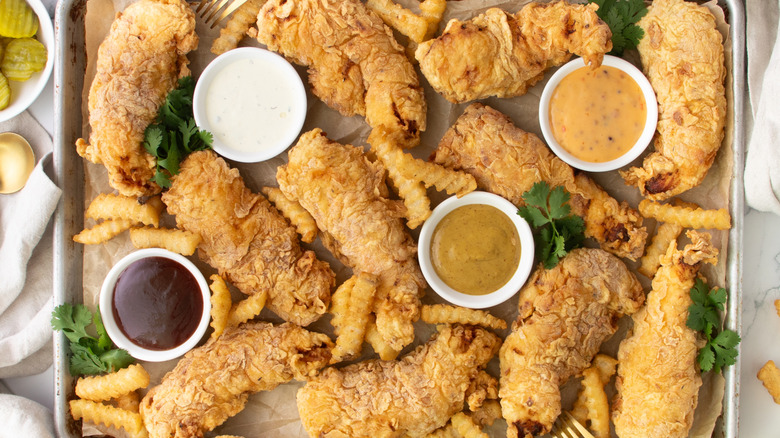
Step 13: Enjoy the chicken tenders
Patterson Watkins/Mashed
Serve the chicken strips right away.
What to pair with extra crispy chicken strips
No matter the occasion, deep-fried chicken is always a treat in its own right. And these double-dipped tenders are seriously crispy and juicy.
Total time: 3 hours, 5 minutes
- For the seasoning blend
- 1 tablespoon paprika
- 1 teaspoon garlic powder
- 1 teaspoon onion powder
- 1 teaspoon chicken bouillon powder
- 1 teaspoon salt
- 1 teaspoon mustard powder
- ½ teaspoon dried thyme
- ½ teaspoon dried oregano
- ½ teaspoon black pepper
- For the chicken
- 1 ½ cups buttermilk
- 2 ½ pounds (about 12 pieces) chicken tenderloins
- 2 ½ cups all-purpose flour, divided
- 1 ½ cups cornstarch, divided
- 1 cup vodka
- 2 eggs
- Oil, for frying
- To make the seasoning blend, in a medium bowl, add paprika, garlic powder, onion powder, chicken bouillon powder, salt, mustard powder, thyme, oregano, and black pepper. Stir to combine.
- Pour buttermilk into a casserole dish, season with half of the seasoning blend, and whisk together.
- Submerge the chicken tenders in the seasoned buttermilk. Cover the dish with plastic wrap and refrigerate for 2 to 4 hours, flipping the tenders midway through marinating.
- Create the dry coating by whisking together 1 ½ cups flour, 1 cup cornstarch, and the remaining seasoning blend in a large bowl. Set aside.
- To start the wet batter, in a large bowl, combine the vodka, 1 cup flour, ½ cup cornstarch, and eggs with a whisk. If it seems too thick, add 1 tablespoon of water at a time to thin it out.
- Once the tenders are done marinating, work in batches to shake off any excess marinade on the chicken strips before completely dredging them in the dry flour mixture.
- Fully dunk the floured tenders into the wet batter. Shake off any excess wet batter before returning the tenders to the dry coating.
- Completely cover the chicken strips in the dry coating.
- Once coated, transfer the tenders to a wire rack on top of a baking sheet. Set aside.
- Fill a deep fryer or a quarter of a large pot with oil over medium-high heat until it reaches 350 F.
- Working in small batches, carefully place the tenders into the hot oil, and fry for 6 to 8 minutes or until cooked through and crisp and golden brown.
- Place the fried tenders on another wire rack on top of a baking sheet or paper towels.
- Serve the chicken strips right away.
| Calories per Serving | 2,199 |
| Total Fat | 136.6 g |
| Saturated Fat | 17.2 g |
| Trans Fat | 0.4 g |
| Cholesterol | 200.0 mg |
| Total Carbohydrates | 153.2 g |
| Dietary Fiber | 6.7 g |
| Total Sugars | 6.5 g |
| Sodium | 1,573.8 mg |
| Protein | 56.4 g |
The information shown is Edamam’s estimate based on available ingredients and preparation. It should not be considered a substitute for a professional nutritionist’s advice.
![]()
Why do you double-dip the chicken tenders and add vodka to the batter?
Patterson Watkins/Mashed
There are countless ways to make chicken tenders, and Watkins' recipe stands out for the double coating, as well as for the vodka content in the batter. She explains that the first dry coating is to help the wet batter adhere to the chicken and build on the layers of flavors. You could stop there, but if you want more flavor and crunch, the final dry coating will give extra flavor, flaky, crispy bits, and enhanced crunch. It's a method also used by fried chicken experts, including KFC. The chain's chicken is double-breaded to get that crisp and retain moisture. Watkins says, "It's a win-win situation that works at home too!"
As for the vodka content, adding it to the batter helps enhance the crispy result because vodka evaporates quicker than water. Aside from a crispy and airy crust, the vodka also allows for a more even browning.
What are some tips and tools for deep-frying chicken at home?
Deep frying is probably not a daily home cooking method for most people, but Watkins has some tips to set you up for success and avoid the biggest mistakes everyone makes. For starters, she suggests using a high-heat thermometer to monitor and maintain the oil temperature. Watkins usually reaches for a candy thermometer or a long, tethered thermometer.
The oil heat tends to reduce a fair bit when you add the chicken, so increase the temperature to 375 F to get it ready for the next batch. As you fry in batches, you'll notice loose brown bits in the oil. Skim the oil with a mesh strainer or spoon to remove them, as they could burn and turn the oil acrid. "Skimmers are also great tools for removing your fried chicken tenders or any fried foods, letting you shake off excess oil too," Watkins says.
Finally, don't skip the draining step before you serve the tenders, as they will soak up a lot of oil during the frying process. "I prefer wire racks for maximum draining," Watkins shares, "Paper towel-lined plates are fine for a quick drain, but not long term; they can get moist pretty quickly."