

The Outer Worlds 2 A Complication with the Computronic Cerebrum quest walkthrough
The Outer Worlds 2 A Complication with the Computronic Cerebrum quest walkthrough
How do you complete A Complication with the Computronic Cerebrum in The Outer Worlds 2? By far the most difficult main quest in the game, if you thought Cloister was massive, well, it's even bigger than that. Tasked with delving into the heart of the Archive to process the rift data, you must take the fight to the full force of the Protectorate as they guard their precious supercomputer.
We've had to make some major decisions throughout the TOW2 quests, but the one at the end of 'A Complication with the Computronic Cerebrum' will undoubtedly leave you scratching your head in confusion. Before you reach the computer where you'll be faced with this dilemma, there are several steps you need to take before you can get to this point in The Outer Worlds 2.

Cross the bridge
To cross the bridge, you're going to need the Rift Anomaly Modulator from Praetor. Once you have it, use it on the Rift Anomaly on the bridge to restore the broken segments, then cross the bridge and use the elevator inside The Archive building. If you're playing with companions, they will ask you to consider your approach given the number of Protectorate guards surrounding the area. You can retreat and try to recruit people to help, or if you're feeling brave, you can brute-force your way in.
Take a left near the Central Interface sign and go up the lift until you're confronted by Protectorate Troopers. The path will be mostly linear from here, forcing you to deal with the guards and auto-mechanical enemies until you reach the Central Interface. You can pick up a side quest when heading to the area from Auxiliary Dabbler Hoyt Schermerhorn, who asks you to find five Sprat Tongues, but this isn't mandatory.
Inside the building, you'll need a Calcaduceus to access the Archive, which you can obtain by talking to Assessor Torbert Ostergard as he stumbles out into the lobby. He reveals that he's the operator of the Archive, but he'll give you the Calcaduceus if you grant him safe passage out of the building. Torbert willingly gives you what you need without much convincing, and if you wait for him to take a few steps, he'll end up falling to his death from his illness, where you can loot it from his corpse.
")
Restore the Thermal Transfer
With the Calcaduceus, you can access the Archive, but you'll soon discover that the supercomputer needs to be repaired before it can process the data. On your way out, you can grab the Emanating Enlightened Seer Tutelary which grants +160% Energy Recharge Rate from the glass cabinet. Proceed to Cloister Underlands and head to the Restore Thermal Transfer objective marker, defeating waves of enemies along the way.
The Thermal Transfer area is teeming with Crabbles, so be prepared to take down these armored creatures. Keep on moving until you reach a space filled with large glass pillars; there's a room with several water pipes placed around the walls. Look at the floor in this room and you'll find the Water Release Valve System Fuse on a bed. Grab that and use it to repair the broken generator, then activate the machine next to it to open the first water release valve.
The second thermal transfer is much easier to activate; you just need to run to a terminal where the Calcaduceus allows you to adjust the power settings, restoring the supercomputer to full strength. It's a long trek to get to the Cold Storage section, and unsurprisingly, the path is filled with Protectorate forces to take down. When you arrive, talk to the Curativist Holder and she'll let you enter the laboratory to trigger the Fire Suppression System, allowing you to pass through safely.
Continue along until you reach the switch to start up the Data Brick Extraction. Make your way to the Rail Operations Platform where you'll find a switch and lift that need powering up. Jump up to the raised platform and keep an eye on the wall until you find a panel to enable the power. With the switch now active, you can start up the conveyor and head up the lift.
With the platforms in place, you're able to get to the Data Gateway Station to open the conveyor doors, sending the storage brick to the supercomputer, which is precisely where you need to go next. Speak to the computer once again, and it'll unlock the upper levels where you must revitalize the reactor to process the rift data.

Punching Processing Rail System
This next section is again fairly linear, but it does require some careful maneuvering through deadly lasers to avoid taking damage. Restart the Punching Processing Rail System to travel downwards towards the reactor. You will need to explore the building to find all the rail system switches, but this doesn't take very long as the building isn't that big. When you have dealt with the punch power processing, all that's left to do is revitalize the reactor.
Continue down the winding pathways to reach the reactor terminals; it's here that you'll need to perform manual maintenance, requiring you to construct an Archive Reactor Fuse with the parts nearby. After you enable the reactor fire suppression system, make sure you disable the security turrets and backup forces before leaving the room to make your life easier on the way out.

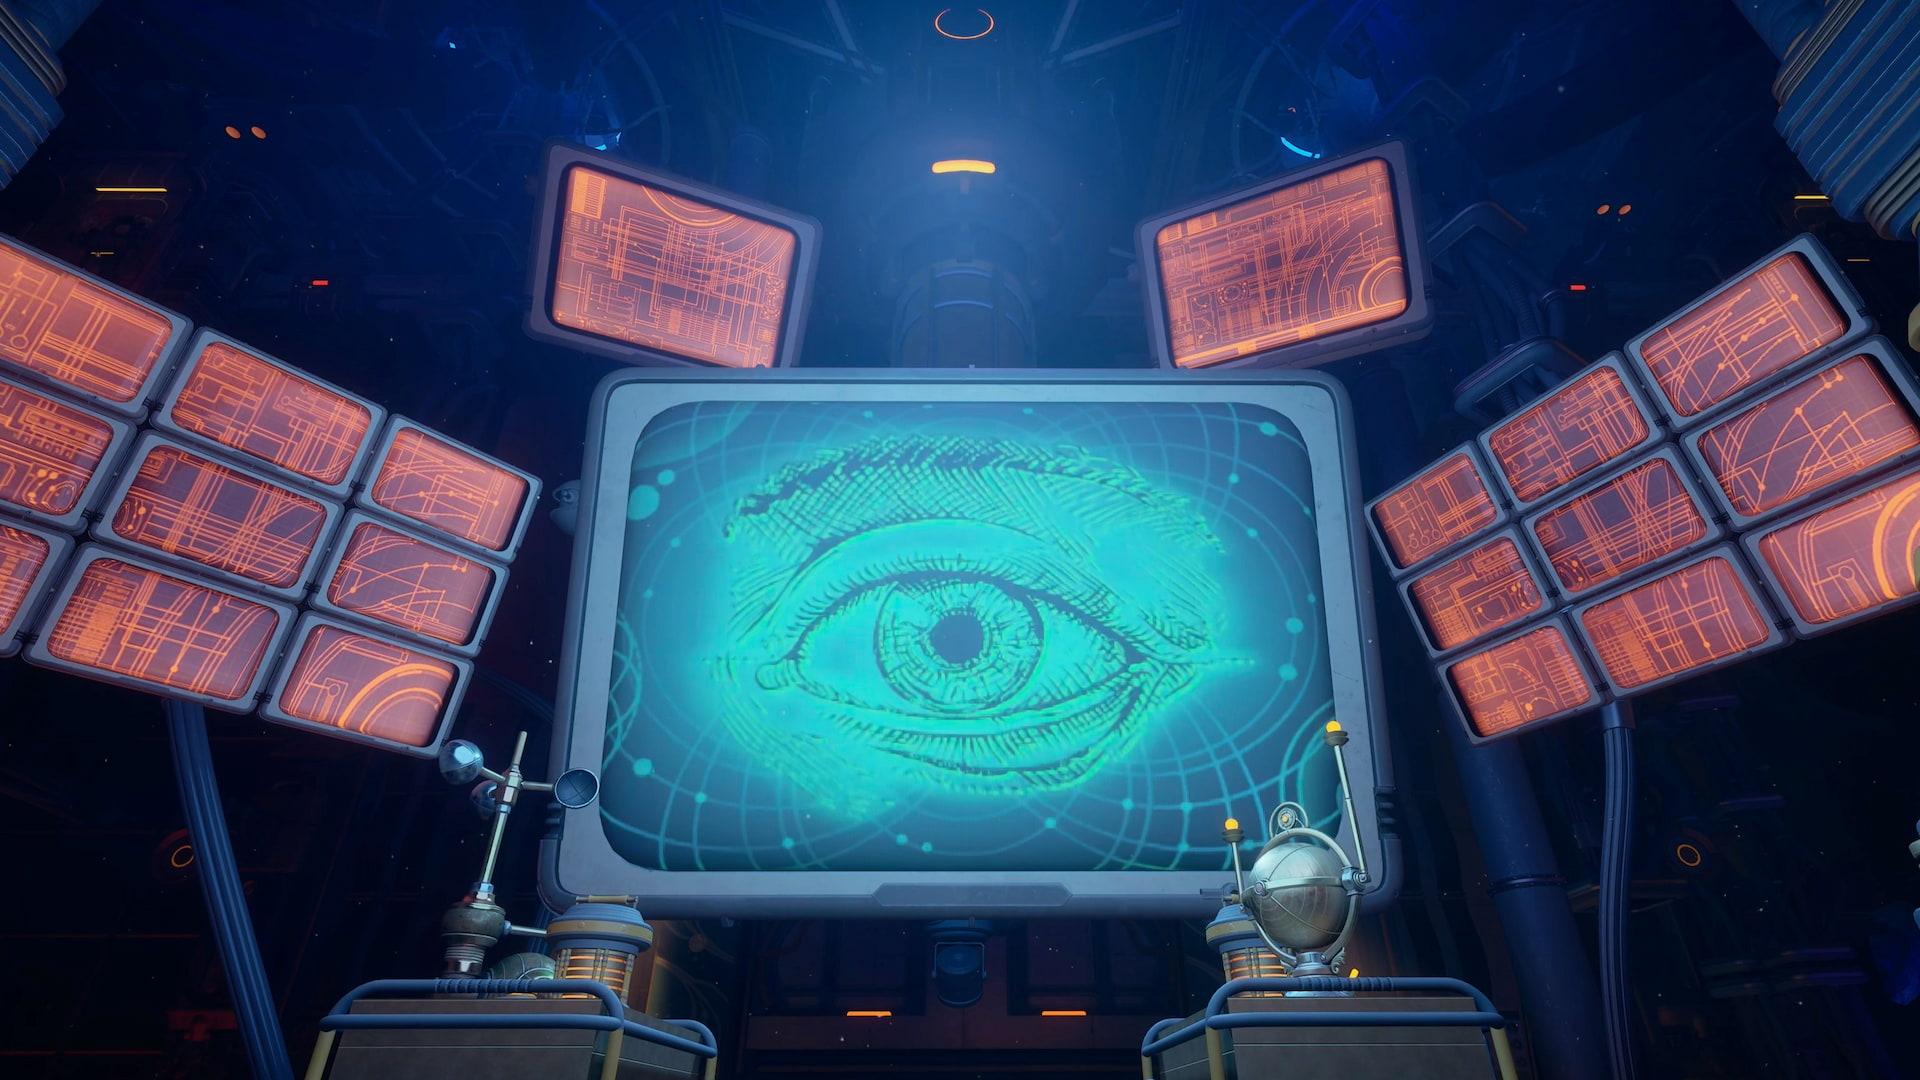
Personality Crisis
Now that the busywork has finally ended, it's time to decide the fate of the Archive. The computers' personalities will plead with you to spare their 'lives', forcing you to switch at least one of them off before you can complete your mission. The decision is up to you, but you will need to perform one last puzzle beforehand involving two switchboards.
Here, you need to flip the switches in the order you want to disable one of the personalities. Once you've done that, activate the power on the other switchboard to commit to your decision.
That marks the end of the quest, and you can begin your journey to the next planet The Outer Worlds 2 map you're exploring.