

Key Takeaways
- Straw bale gardens work well for veggies, herbs, and flowers but not perennials or larger plants.
- Bales need to be conditions for at least 12 days with water and fertilizer before planting.
- Plant conditioned straw bales with seeds or transplants, and water often.
Straw bales are often used for fall decorating, but did you know you also can turn them into a budget-friendly raised bed garden for growing vegetables, herbs, and annual flowers? Once winter sets in, don't toss your bales. Instead, follow this step-by-step guide to repurpose your bales into the perfect raised bed, no carpentry skills or digging required.
What Is a Straw Bale Garden?
Straw bale gardens are a type of temporary raised bed that can be created on top of poor soil or even pavement. Bales can be laid out end-to-end to create a garden row or positioned in L-shapes, U-shapes, or other configurations. These beds are only intended to last for a season, and then they’re raked into the soil or turned into compost.
Because of their temporary nature, it's best not to use them for perennials that return year after year. And because of their compact size, straw bale gardens aren’t recommended for large crops, like corn. But while they last, the bales can house an impressive amount of ornamentals or edibles, which are directly planted into the bales as either seeds or seedlings in spring.
Choosing the Right Straw Bales
You can repurpose straw bales from your fall porch display or purchase bales at a livestock feed store or garden center just to use for making a raised bed. In either case, make sure the bales are made from weed-free straw, not hay. Hay tends to have more weed seeds than straw, which can lead to weed issues. It’s also important to ask if the straw is herbicide-free, because treated straw can interfere with plant growth. And if you're planning to grow edible plants, you may want to look for organic bales.
Related
Steps for Creating Your Straw Bale Garden
Before you can start planting in straw bales, you'll need to condition the straw for growing. Conditioning is a simple process in which straw bales are watered and fertilized for about 12 days before planting. This prompts the straw to start decomposing, ensuring the bales won’t overheat and burn your plants later. You can either start this process in the fall, or wait until spring.
1. Select a Growing Location
Find a suitable spot for your straw bale garden that receives enough light for the plants you want to grow. Most vegetables require at least 6 to 8 hours of direct sun daily, but some herbs and flowers can tolerate less light.
Locate your straw bales near a water source (or install a drip irrigation system). You'll likely be watering them every day.
2. Prepare the Area
Prep the location where you want your garden to be by leveling raised spots with a shovel, pulling out large weeds, and mowing the grass short. If weeds or grass were already growing in the area, lay down some weed barrier fabric or a layer of mulch, cardboard, or newspaper to prevent the weeds from regrowing.
3. Position the Straw Bales
Lay out your straw bale garden in a way that appeals to you. You can position the bales end-to-end in a row or another shape or place several bales close together to create a wider planting area. Make sure that wider beds are less than 4 feet across so you can easily tend your plants—and don’t remove the baling twine or wire.
Position each straw bale on its side so the baling wire or cord is facing the side and the cut straw ends are facing up and down. When you’re done, you can pound some wooden stakes or pieces of rebar around the exterior of the bales to keep them from budging, but this is optional.
4. Add Fertilizer and Water
Make sure you’re happy with the placement of your garden, as straw bales are heavy when wet. Then, sprinkle ½ cup of high-nitrogen fertilizer, like blood meal or soybean meal, across the top of each bale and water the bales deeply until they’re saturated and water runs through the base.
5. Keep Fertilizing and Watering
Water the straw bales deeply every day during the conditioning process, and apply another ½ cup of high-nitrogen fertilizer on each bale on days 3 and 5. On days 7 and 9, apply ¼ cup of high-nitrogen fertilizer. Then, apply a final application of 1 cup of balanced fertilizer per bale on day 10.
6. Check the Temperature
On day 11, check the temperature of the straw bales with a compost thermometer or by placing your fingers a few inches inside a bale. If the bales are warmer than 99°F or feel warm to the touch, keep watering them daily until they cool down. You’ll know the bales are ready for planting when they’ve fully cooled.
Planting Straw Bales
Seeds or seedlings can be planted directly into straw bale gardens at the recommended planting time for the type of plant you’d like to grow. Warm-weather plants, like peppers, should only be planted outdoors after your last frost date of spring, but cold-hardy crops, like brassicas, can be planted earlier.
Planting Seedlings
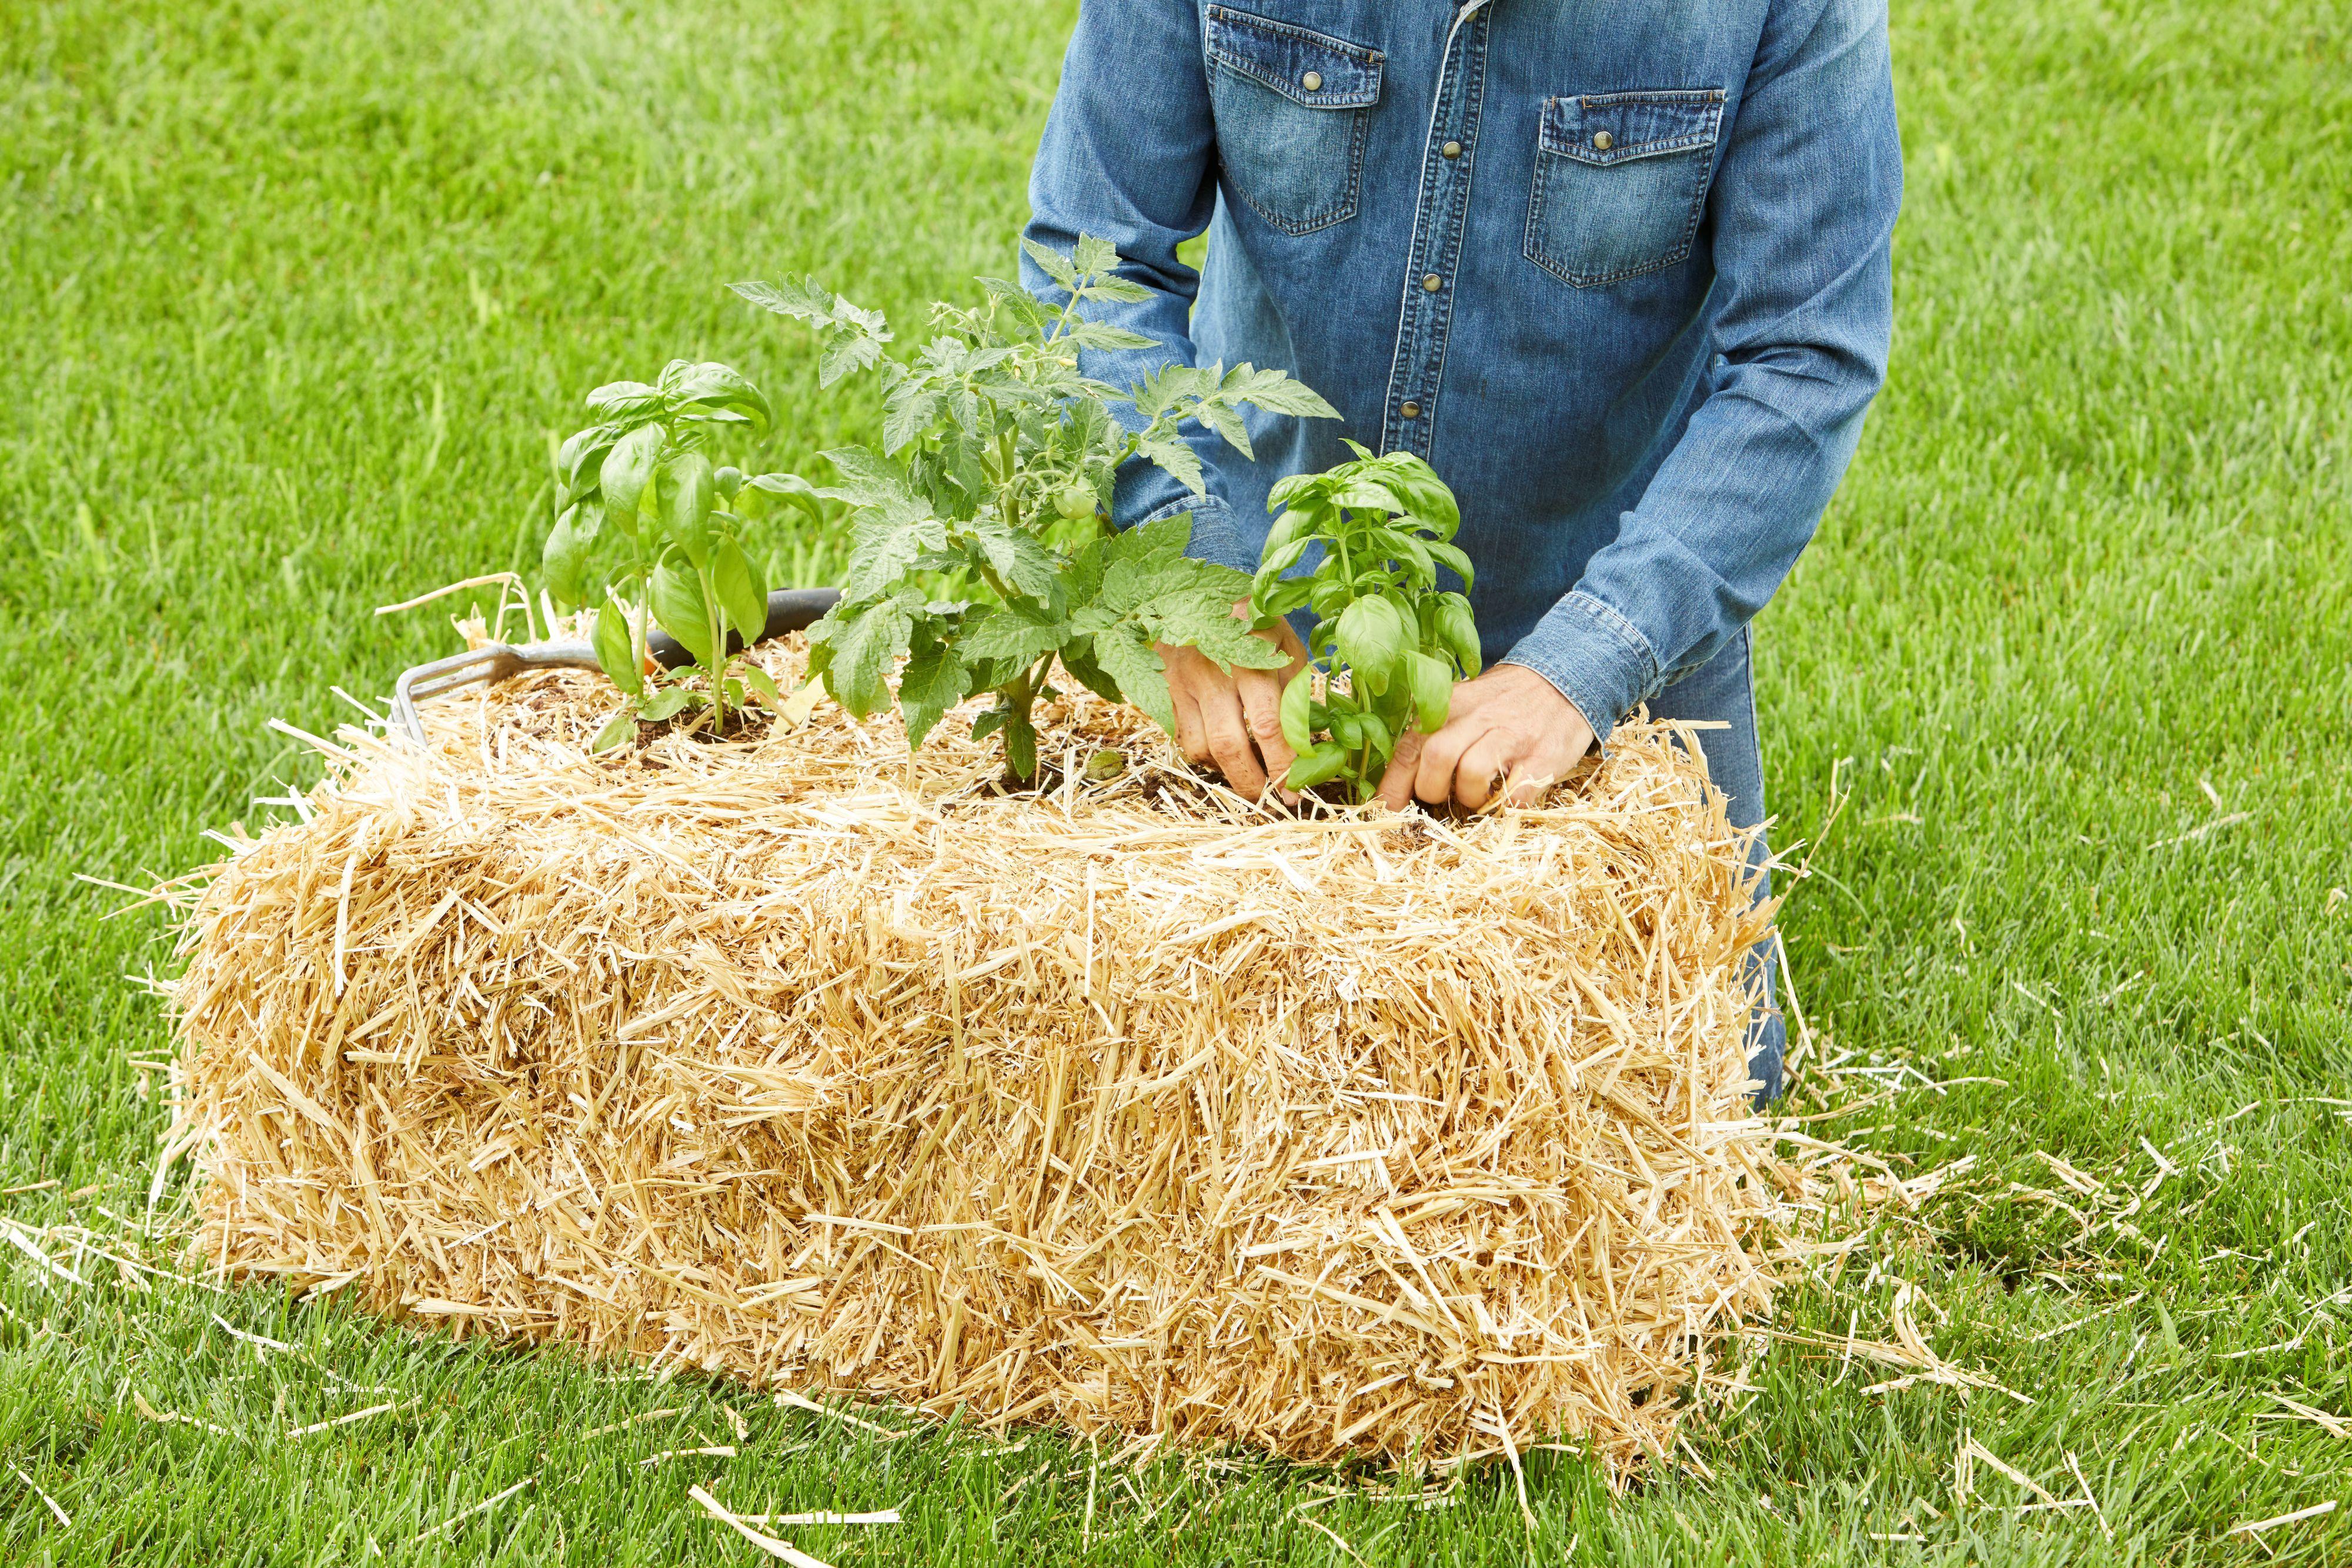
If you’re planting seedlings or nursery starts, use a hand trowel to loosen a hole in a straw bale that’s slightly larger than the plant’s root ball. Add a trowel full of bagged garden soil or compost to the hole and lightly press the soil into the hole to remove air pockets. Position the seedling in the hole at the same depth the plant grew in its original pot. Backfill the hole with more soil or compost, firm the soil around the plant’s stems, and water well.
Sowing Seeds
If you’re planting seeds into straw bales, you have two options. Either spread a 1- or 2-inch layer of bagged garden soil mixed with compost on top of the bales and sow the seeds into the soil, or dig small holes in the bales, fill the holes with soil, and then plant seeds in each hole. Either way, when you’re done planting, water the seeds to help them sprout.
What Can Grow in a Straw Bale Garden?
Cucumbers, beans, small squash and melon plants, annual herbs, determinate tomatoes, peppers, eggplants, lettuce, leafy greens, and annual flowers like cosmos and zinnias are just some of the plants that can grow in straw bale gardens. You can even plant some crops, like strawberries or potatoes, on the side of straw bales to give you more growing space.
Here’s a general idea of how many plants each straw bale can hold, but always double-check the spacing guidelines on your seed packets. Space lettuce, beans, and herbs according to the seed package directions.
- 2-3 tomatoes
- 4 peppers
- 2 bush-type cucumbers, squash, or zucchini, or 3 to 4 vining varieties with a small trellis
- 1-2 pumpkins